Garage door cables are an integral part of the garage door system, and they play a crucial role in lifting and lowering the door. Over time, these cables can become worn or damaged, which can cause a variety of problems with the operation of the garage door. If your garage door cables are in need of repair, it’s important to understand the basics of garage door cable repair so that you can ensure that your garage door is functioning safely and efficiently.
The first step in garage door cable repair is to determine the cause of the problem. In some cases, the cables may simply need to be adjusted to ensure that they are properly tensioned. However, in other cases, the cables may be broken or frayed, which can cause the door to become off-balance and prevent it from opening or closing properly.
Once you’ve determined the cause of the problem, you can begin to repair the garage door cables. The first step is to disconnect the garage door opener to prevent any accidental opening or closing of the door while you are working on it. To do this, locate the emergency release cord, which is usually located near the motor unit, and pull it to release the garage door from the opener.
Next, you’ll need to secure the garage door in place to prevent it from falling. This can be done using locking pliers or C-clamps to secure the door to the track. This will hold the garage door in place while you work on the cables.
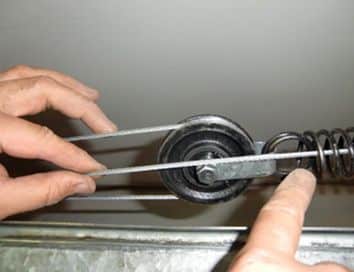
To remove the damaged cable, start by removing the bottom bracket from the garage door. This will allow you to remove the damaged cable from the pulley. Next, disconnect the cable from the spring, which is usually located near the motor unit. This can be done using a pair of pliers to grip the cable and twist it to release it from the spring.
Once you’ve removed the damaged cable, it’s time to install the new one. Start by threading the new cable through the bottom bracket and the pulley. Next, attach the cable to the spring using the pliers to twist it in place. Make sure the cable is properly tensioned to ensure that the garage door opens and closes smoothly.
After you’ve installed the new cable, it’s time to reconnect the garage door opener. This is done by pulling the emergency release cord to release the garage door from the track. Then, manually lift the garage door and re-engage the opener by pulling the cord once more.
It’s important to note that garage door cable repair can be a dangerous task, and it’s best to leave it to the professionals if you’re not comfortable doing it yourself. A professional garage door repair technician has the experience and tools needed to safely and efficiently repair or replace your garage door cables.
To prevent the need for garage door cable repair in the future, it’s important to perform regular maintenance on your garage door. This includes lubricating the moving parts of the door, checking the cables for wear and tear, and ensuring that the door is properly balanced. Regular maintenance can help prevent the need for expensive repairs and ensure that your garage door is operating safely and efficiently.
Garage door cable repair is an important task for ensuring that your garage door is functioning safely and efficiently. By following the basics outlined in this guide, you can repair or replace your garage door cables quickly and easily. However, if you’re not comfortable performing the repair yourself, it’s best to hire a professional garage door repair technician to do the job. A professional technician can ensure that your garage door is repaired correctly and safely, saving you time and money in the long run.
Read More:
Garage Door Cable Repair: A Guide to Common Problems and Solutions